
Introduction
It’s quite common for people to deal with an iCloud activation lock when they buy a second-hand iPhone or don’t remember their iCloud password after resetting their existing iDevice. In either case, the iCloud activation lock can be extremely frustrating as it’ll literally prevent you from accessing the iPhone as long as you don’t sign-in with the right iCloud credentials.
The good news is that there is a way to get past the activation lock screen, even if you don’t remember the iCloud account details. You can use an iPhone DNS bypass server to bypass the activation lock and remove the existing iCloud account.

In this guide, we’ll walk you through what iPhone DNS bypass means and how you can use it to get rid of iCloud activation lock on your iPhone/iPad.
Part 1: What Should You Know about iPhone DNS Bypass?
For people who don’t know, the DNS bypass method is a way to get past iCloud activation lock without actually entering the iCloud credentials. When you factory reset an iPhone or restart a used iPhone, an activation request is sent to the official Apple server and you get prompted to the activation lock screen. If you enter the right credentials, the activation request gets processed and you are allowed to access the iPhone.

But, when you don’t know the iCloud credentials, you can use the iPhone DNS bypass method and redirect the activation request from the Apple server to the iCloud Bypass DNS server. This way you can authenticate yourself without actually entering the iCloud username and password.
Even though it may seem a bit complicated at first, using iPhone DNS bypass is a fairly easy process. All you need to do is bypass the request from one server to the other and authenticate yourself. In saying that, however, this method has a few limitations as well.
For instance, when you’ll bypass the iCloud activation using a DNS server, you won’t be able to access all the features of your iOS device. The majority of iOS services won’t work at all. Moreover, this is not a full-proof method to remove iCloud activation lock. In fact, it might not even work on devices that have iOS 11 or later.
Pros:
- Quickest Way to Unlock an iPhone
- You’ll be able to install and use new applications on your iPhone
Cons:
- DNS bypass is simply a hack that doesn’t ensure 100% guarantee
- You’ll have access to limited iOS features
- It might not support all iOS versions, especially the latest iOS 13,14
Part 2: How to Use iPhone DNS Bypass to Remove the Activation Lock?
Despite having its own set of limitations, it’ll be completely worth it to give DNS bypass method a try before you resolve to other solutions. Let’s quickly walk you through the step-by-step process of using iPhone DNS bypass to get rid of iCloud activation lock.
Step 1 – Enter a SIM card in your iPhone and power up the device.
Step 2 – You’ll be prompted to the “official setup” screen. Here choose your language to get started.
Step 3 – Now, you’ll be asked to choose a WIFI connection. Instead of connecting to a Wifi, click the “i” button and tap “Forget Network”.

Step 4 – Swipe Up and click “Start Over” to start this process from scratch again.
Step 5 – Again, choose a language and tap the “I” icon next to Wifi. Copy and paste the right address, from the following list, in the “DNS” tab.

| USA: 104.154.51.7South America: 35.199.88.219Europe: 104.155.28.90Asia: 104.155.220.58Australia and Oceania: 35.189.47.23Other continents: 104.155.28.90 |
Step 6 – Go back and connect to the Wifi.
Step 7 – On the next screen, click “Back”. Wait for a few seconds and you’ll see a confirmation message on your screen that you’re authorized to access the iPhone.
Part 3: What to Do If iPhone DNS Bypass Doesn’t Work?
Use WooTechy iSalvor
As we mentioned earlier, the iPhone DNS bypass isn’t a full-proof solution. So, if you’re still unable to get rid of the iCloud activation lock, the next step would be to use a professional tool to get the job done. You can use WooTechy iSalvor, an iCloud activation lock bypass tool that’ll help you instantly remove the activation lock and set up the device as per your preferences.
You can use WooTechy iSalvor to bypass the iCloud activation lock on iPhone, iPad, and even iPod Touch without the need of a password. The software works with every device ranging from iPhone 5 to iPhone X. It also supports the majority of iOS versions including iOS 11 and iOS 12.
So, if you didn’t have any luck with iPhone DNS bypass, follow these steps to remove the iCloud activation lock using iSalvor.
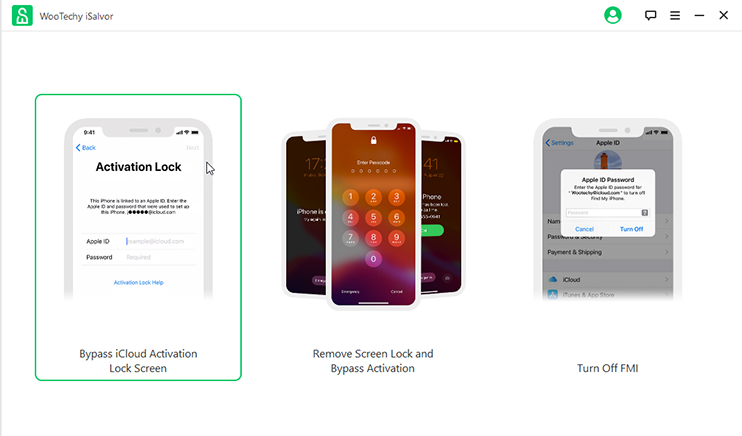
Step 1 – Download and install iSalvor on your PC. Launch the software and select “Bypass iCloud Activation Lock Screen”.
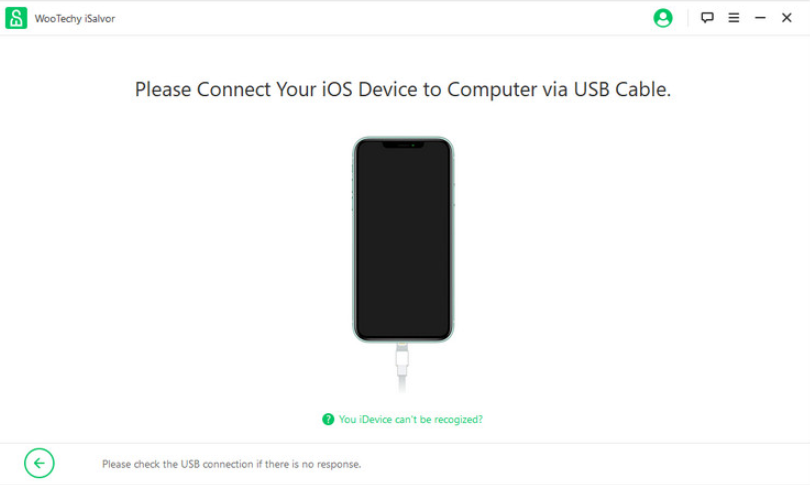
- For macOS: If you’re using the software on a Macbook, the software will automatically find and download the right Jailbreak tool for your device. After that, simply click “Start Jailbreak” to proceed further.
Then, you’ll have to follow the on-screen instructions to put your iDevice in DFU mode to complete the jailbreak process.

- For Windows: Unfortunately, there’s no direct tool to jailbreak an iPhone via Windows. You’ll have to follow a dedicated process to jailbreak the device. You can click “Jailbreak Tutorial” to check out this process or tap “Finished Jailbreak” if you have already completed the process.


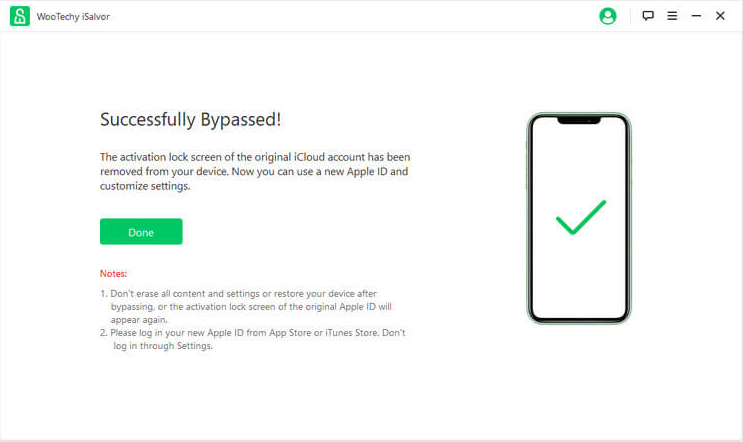
Congratulations! your iPhone is now unlocked and you’ll be able to use it without any interruption whatsoever.
Contact The Owner to Remove Remotely
Another way to bypass iCloud activation lock screen is to contact the previous owner of the iPhone. This method will only work when you have purchased a second-hand iPhone from someone who you actually know. In this situation, all you have to do is contact the original owner and ask him/her to remove the device from their iCloud list.
Here’s the step-by-step process to get rid of iCloud activation lock by contacting the original owner of the iPhone.
Step 1 – Ask the person to open iCloud.com on his/her PC and login with the right credentials.
Step 2 – Then, ask them to click “Find iPhone”.

Step 3 – Using the drop-down menu at the top of the screen, choose your iPhone from the list.

Step 4 – Finally, click “Erase iPhone” to remove the device from the person’s iCloud list.

That’s it; you won’t encounter the iCloud activation lock anymore.
Ask Apple for Support
In case nothing works so far, the only solution would be to contact Apple’s official support. Even though this method may not work all the time, you can give it a shot, especially if you’ve got the right documents. When you’ll contact Apple’s customer service, they’ll ask you to present a proof of purchase. You can showcase the bill along with one of your identity cards.
If Apple could verify the previous owner, they’ll automatically remove the iCloud activation lock from your screen. However, this method can take anywhere between 3-4 days as Apple will need time to process your request.
Part 4: Common Questions about iPhone DNS Bypass
Q1: The DNS Bypass Doesn’t Work. Why?
The iPhone DNS Bypass is a simple hack that doesn’t work all the time. It only works for limited iOS versions. For instance, if you’re using the latest iOS 14, the DNS bypass method won’t work and you’ll have to use one of the other solutions.
Q2: Successfully Bypassed Activation with DNS Bypass. What’s Next?
After you’ve successfully bypassed iCloud activation lock with DNS bypass, you can proceed further to use your device. Though you won’t be able to use the majority of iOS services, you could still use your iPhone to access the Internet, install different apps, click pictures, etc.
Q3: Do I Need a Sim Card For DNS Bypass?
Yes, it’s necessary to insert a SIM card into your iPhone before you proceed with the iPhone DNS bypass. If you don’t insert the SIM card, you won’t be able to paste the DNS server address.
Q4: Is Jailbreak Required for Activation Lock Bypass?
If you use the DNS bypass method, you don’t need a jailbroken iDevice. However, if you use a professional bypass tool, it’ll be crucial to jailbreak the device before you can bypass the iCloud activation.
Q5: Should I Pay for an Activation Lock Bypass Tool?
In case you were unable to bypass iCloud activation lock with DNS bypass, it would be better to pay for a professional unlock tool to get the job done. This will still be much cheaper than getting the iPhone repaired at a professional service centre.
Conclusion
While iPhone DNS bypass is a great tool to unlock a locked iPhone, it doesn’t work all the time. You can try this method at first, but if it doesn’t work, you can also use iSalvor, a professional iCloud activation lock bypass tool.