
Instead writing a blog in text, people now are more likely to share Vlog instead. Vlog, which stands for video blog, is a new type of blog that are widely used to record people’s daily life. On YouTube, there are also many celebrities who are regularly uploading Vlogs for both business purposes and personal sharing customs.
Do you also want to start recording your life through Vlogs? This review is set for those who need some tips on starting their Vlog making process. Actually, it’s not difficult for a no-experience Vlogger to start making their first Vlog. Get these tips now and you can quickly become an experienced Vlogger! Now, let’s start!
1. Get Inspiration
Firstly, you need to focus on one topic, and all your Vlog ideas can easily surround this topics. For example, “Mukbang” is quite popular in Korea, which is focusing on the host who would shoot how they have some delicious foods; other Vlogs like those recording the gaming processes, or traveling Vlogs that have recorded a wonderful trip down are all popular. If you just want to share Vlogs about your daily life, simple setting the main topic of your channel to be “Daily Life Sharing” is also available. If you have no idea about what types of Vlogs you are going to share, you can see how other YouTubers do and get some inspiration from others. However, copying is not a good idea.
2. Create Your Own YouTube Channel
When you decide to start your Vlog journey with certain topics, you can create your own YouTube Channel now. The process is not a difficult process, but an essential thing you should prepare in advance is Google Account. You need to apply for one (if you don’t have one) and verify it in advance.
When you get the Google Account, now let’s go through the steps to create your own YouTube channel.
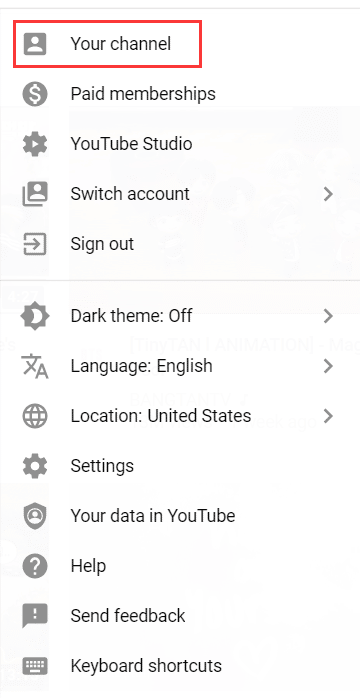
STEP 1. Sign in with your Google account in YouTube platform. Then click your profile and choose the “My Channel” option.
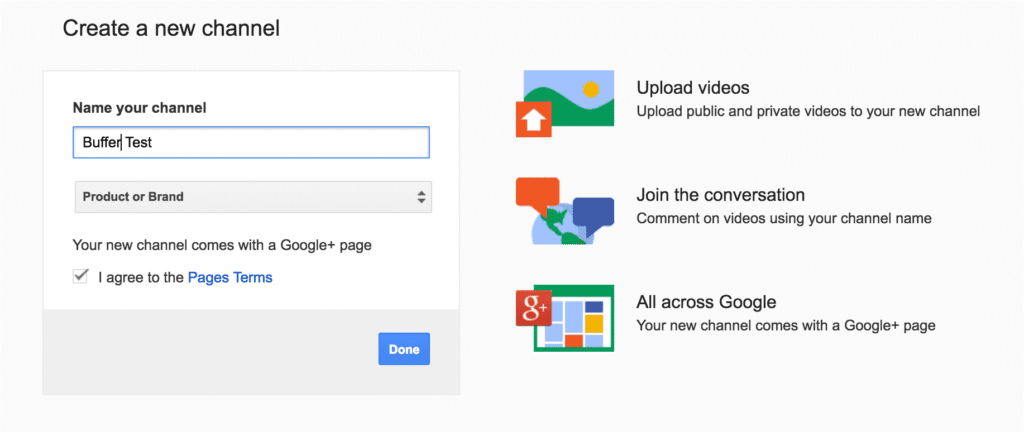
STEP 2. Set the name for your channel, and select the category for your channel, then continue by tapping “DONE”.
STEP 3. Now your YouTube channel is created. Just customize the interface and other settings for the channel, such as selecting a nice background picture, channel image, and connect it with your other social media account or website.
Here are some small tips when you create the YouTube channel. Firstly, please come up with the name that suits the topic of your Vlog videos. Also, write attractive and appropriate description can also help boost the views and subscribers for your channel. You may check YouTube promotion services to get an idea about the promotional tools. Last but not least, you can link your channel with other of your social media accounts such as Facebook, Twitter, Instagram, and even your own website, which enables you to share your Vlogs to other platforms conveniently.
3. Prepare for Your First Vlog
Now you can start to plan your first Vlog to get started! To begin, you need to consider what the main topic of your Vlog should be. You need to think how many parts your Vlog should have? And what kind of videos you should create for each part? What you need to present in each of these video clips to make it funny or attractive? After listing the video materials you may need for making a complete Vlog, then you can go to the next step.
4. Film A Vlog
According to the video clips list you need, now you can begin to film them one-by-one. Here are some tips for you:
• No matter you are using a smart phone or a camera to shoot the videos, please make sure the resolution is high enough for streaming with clear experience. No one would be willing to watch a vague video today.
• Adjust the lightning and the audio quality of your video to be proper. If the background noise is too loud, you can record the audio separately and then merge them together when you edit the Vlog.
• Interact with your audiences in the video clips. You can ask some questions, or invite them to subscribe to your channel, etc. Just make your audiences feel that they are engaged.
• You can add personalized gestures or slogans to make them become your symbols.
• Try every mean to make your Vlogs yo be interesting and attractive. For example, you can tell some jokes in the video or make funny facial expressions. You can also invite your friends to shoot the video together! However, please be yourself and original, otherwise the Vlogs may be the same as other thousands of videos.
5. Collect Related Video/Audio Materials
When your required video clips are all filmed, you can transfer them to your desktop and begin the editing process. You may need some other video/audio materials such as the background music or funny sound effects, etc. You can get many copyright free materials on YouTube platforms. The way to download them is to use a reliable YouTube video downloader, here I recommend VideoHunter, which supports high quality and fast downloading service. Below is the simple way to use it:
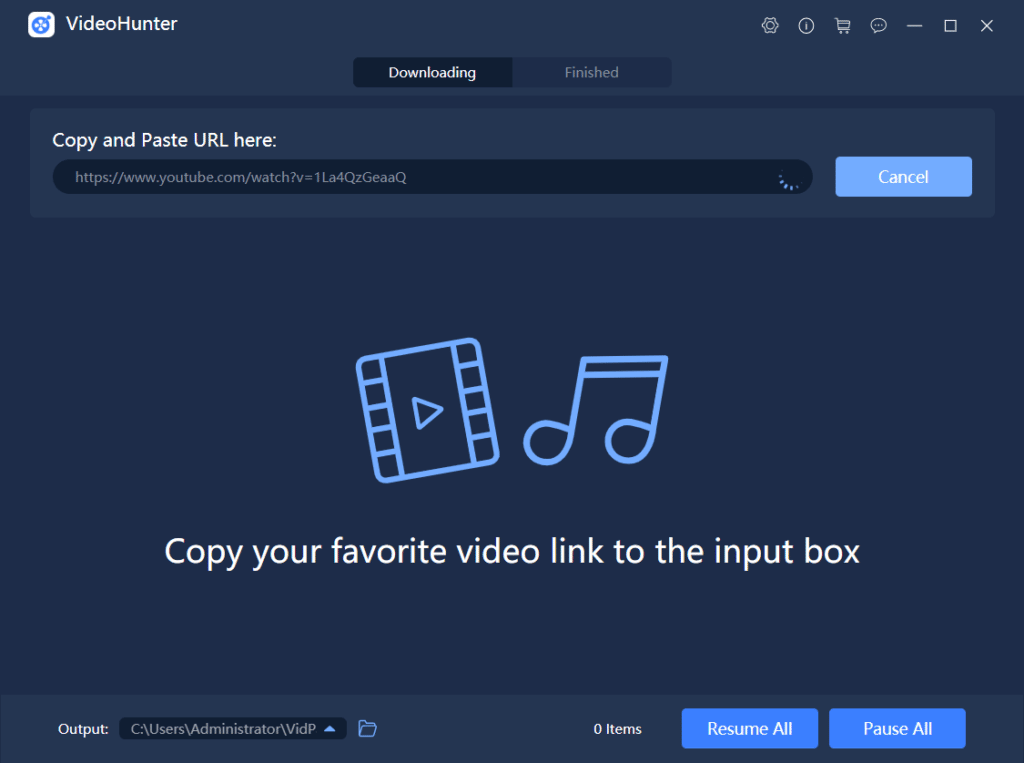
STEP 1. Go to YouTube and search for the video/audio material you need to use in your Vlog, then copy the URL of it.
STEP 2. Paste the URL to VideoHunter’a frame bar. Then you should click the Analyze button to convert the video.
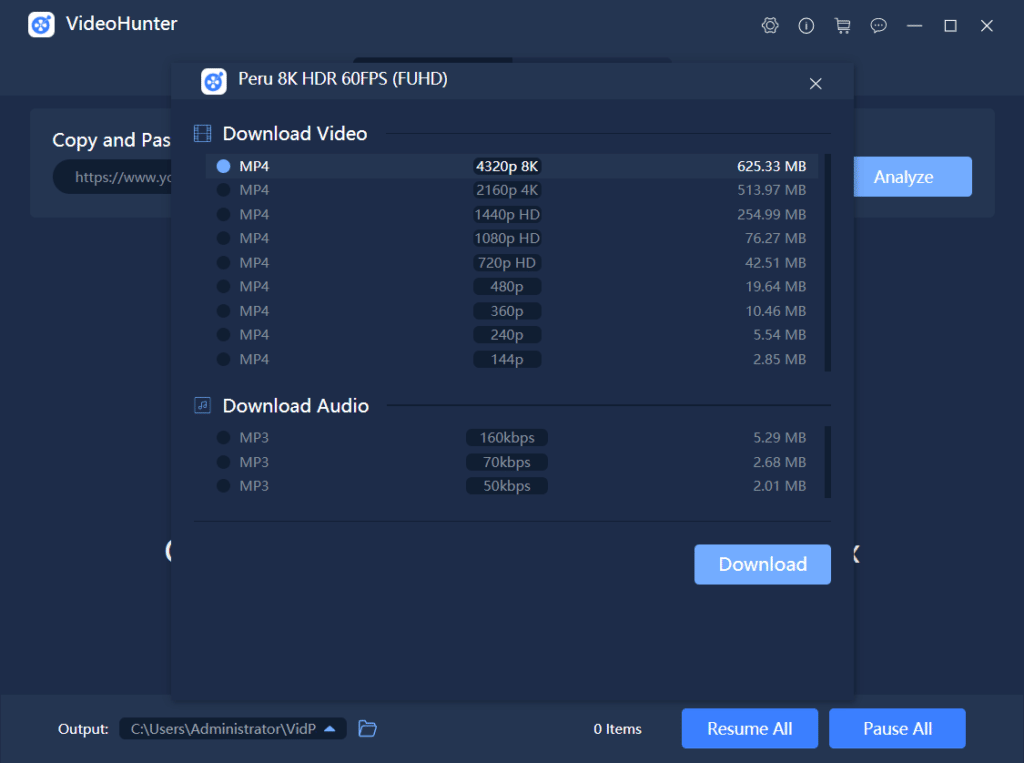
STEP 3. Select an output format and quality for the material. VideoHunter offers MP3 and MP4, which are compatible by most video editors. So after choosing, click the Download icon to save it offline.
6. Edit Vlog
When all the materials are well prepared, you can start the editing process now. There are many professional and helpful video editors provided to edit the Vlog to be a perfect videos. For example, for advanced video editors, the well known Adobe Premiere Pro and Final Cut Pro (Mac) are both good options. If you are new to video editing, then the simple version EditMyVid is also an ideal choice. Just choose the one that suits your need and is convenient for you to use.
7. Upload Vlog to YouTube
Now, when your Vlog video is completed editing, go to YouTube and upload your fist video to the channel now! The simple tutorial is provided here for you.
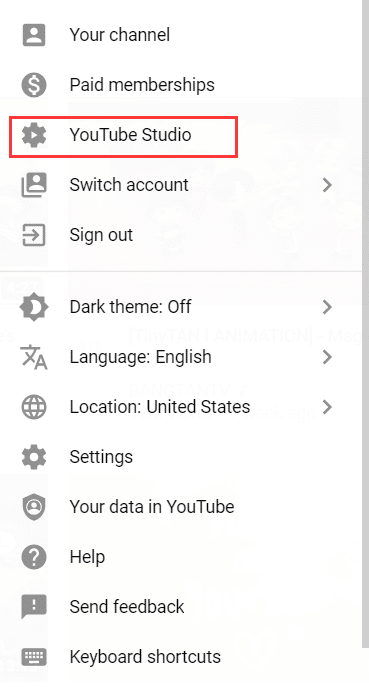
STEP 1. Go to YouTube and login in with your YouTube account. Then, please click the profile image and then select “YouTube Studio”.
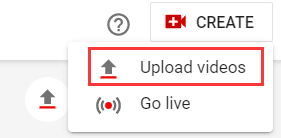
STEP 2. Now, on the top right of the interface, you can see a “CREAT” button. Click it and choose “Upload videos” option.
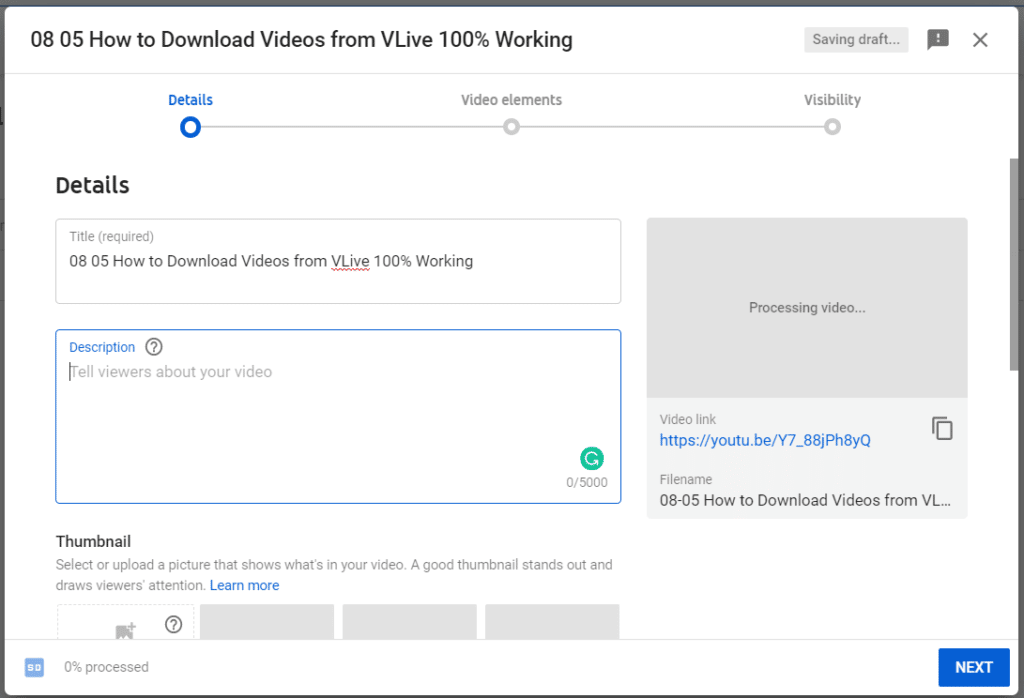
STEP 3. Now a window will come up and allow you to upload the Vlog for editing and uploading. Firstly, select the video from your computer, and edit its title, description, and other simple options are needed to select.
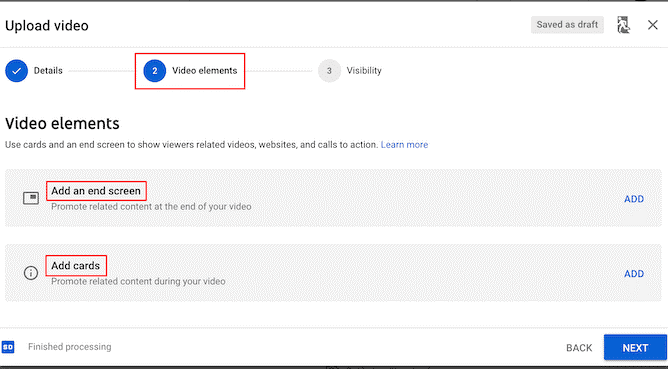
STEP 4. Then click “Next” and you can edit two parts. One is the end screen, while the other is to add a card to the video. Basing on your needs, choose whether to add these two parts to your video.
STEP 5. The final step is to publish your video! You can also select to set the video to be private or unlisted. In addition, you can also select a time to schedule the video for automatically uploading later at a certain time.
Then your Vlog can be successfully uploaded to the channel. You can copy the URL of the video and share with your friends!
8. Prompt Vlogs Through Social Media Platforms
In the video page of your Vlog, you can easily find a SHARE icon under the video. Here, you are able to directly share the video to your related social media platforms such as Facebook, Twitter, Instagram, Reddit, and so on. By sharing your Vlog to other social media platforms, you can get the video be exposed to more people, which can improve the views of your videos and may bring more subscribers to your channel. Therefore, make full use of these platforms!
Going through these steps, you would probably find that starting your first Vlog is not a difficult task. If you are considering to record your life with the form of Vlog or be a professional YouTuber, start from now with this guide!